How To: Light Paint with your camera

Light Painting is infact super simple once you know what you're doing. I learnt how to do it in 20 minutes. An hour later and I've got 4 shots I'm happy with and edited (saturation, ambience and a little contrast)

So you will need -
An area that can be in darkness,
A subject
A light, or two, three, whatever
Your camera.

Here's an indepth of what to do.
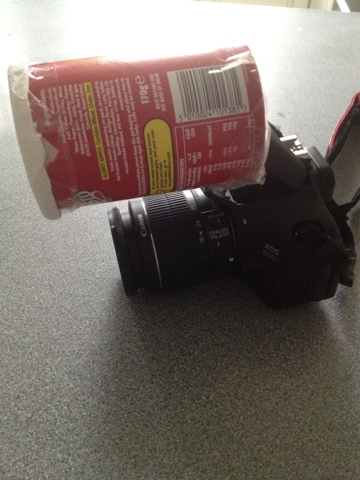
In the light, set up your camera either on a table or on a tripod so it can't move. Set up your subject, get your manual focus right and then adjust your camera settings.

Settings I used - Manual, ISO 100, f18, shutter speed 20 seconds.

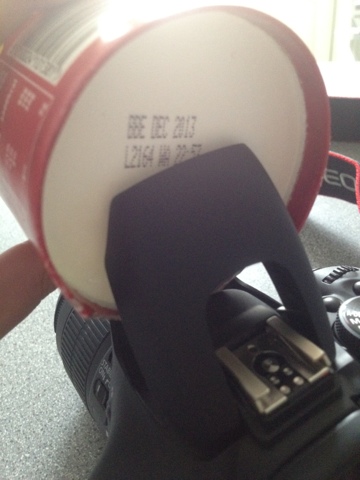
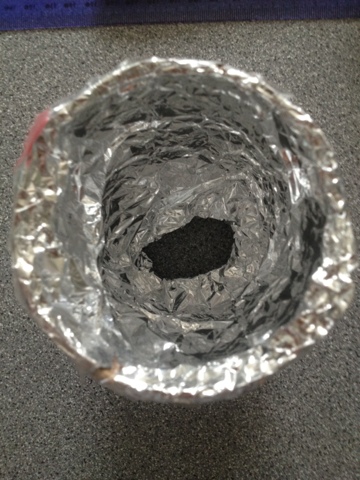
Now get your area in darkness, get your torch or light source ready. Press down your shutter button and start with your painting.
Random movements work well but so do precise movements, it's all child's play really.

Make sure you don't get your hands in the shot too much as this will affect the outcome.
Your shutter will close. And your done! Turn back on your lights and see what you've done.

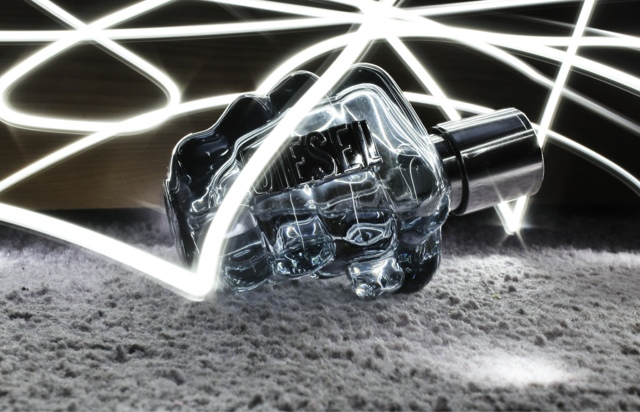
My 4 shots taken on the canon 600d with kit lens of a diesel aftershave bottle using the iPhone flash as a torch with the app iTorch.

Happy painting!

How To: DIY DSLR Pop Up Flash Snoot , Diffuser & Filter

Following on from the DIY DSLR Pop-Up Flash Diffuser made from a milk bottle at a zero cost, I've now made a pop up flash snoot, diffuser and a filter all in one.

The total cost of this is nothing again!
(depending on what you have in your cupboards of course)

Pictures follow the post

Gather your materials: You will need:
A ruler, a marker pen, some foil, scissors, sellotape / glue, your camera, a gravy granule tube (Bisto), the Bisto lid or pringles lid and some kitchen roll or ripstop nylon or any diffusing material.

Step 1- Cut out part of the base rim out of the tub (this is so it fits better onto your pop up flash)

Step 2- Line up your flash, mark the edges, and cut out of the base of the Bisto.

Step 3- Now cut a square of foil big enough to line the tub. Scrunch it up to get more reflection. Then tape this down at the ends, trim to size.

Step 4- Cover your clear Pringles lid with your diffusing material, I used kitchen roll. And tape it down.

Step 5- Attach your lid to the Bisto tub, and voila! Your done!

Remove the lid and you've got your snoot.
Attach the diffused lid for your diffuser.
Attach the red Bisto lid for a red filter (no picture, but it works!)

Thanks for reading!


How To: DIY DSLR Pop Up Flash Diffuser

I've seen a great deal of DIY flash diffusers on google, all ranging in cost, some made from foam, some cardboard, some bubble wrap even! But typically you can only find DIY diffusers for external / hotshoe flashes.

However if you're like me and stuck with the pop-up flash for the time being, but still want a diffuser, then read on!

The DIY pop up flash diffuser - costs NOTHING!
(Pictures in sequence below)

What you'll need:

An empty milk bottle, ruler, sharpie / marker pen & scissors (and of course your camera)!

Step 1 - Mark out the bottle as per picture below, repeat on both sides, and link up your marks (behind bottle handle)

Step 2 - Cut it out, (If you're young, please get an adult to do it for you) you should be left with something looking like the picture.

Step 3 - Measure + mark the lens size as per picture. Then cut this out with your scissors (I also cut an extra notch to fit inside where the flash pops up from - see picture)

Step 4 - Cut the long piece of plastic - so that you can make a latch, you'll have to measure this yourself (you'll see what I done in the picture)

Step 5 - Make a slit in the plastic for your little latch to go through, this will act as a lock to stop it falling off.

And you're done! A totally free DIY DSLR pop up flash diffuser made from a milk bottle.
Happy snapping!